Project 112-1
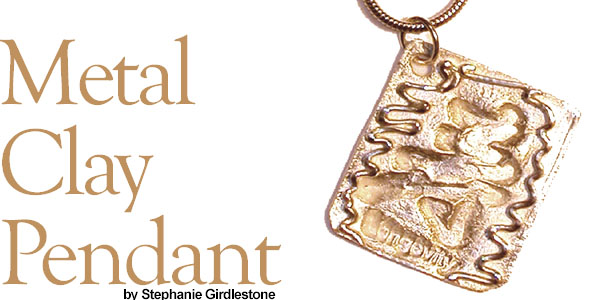
Metal Clay Pendant
Materials Needed
- Art Clay Silver Low Fire Slow Dry 50 grams F14-2628BS
- Art Clay Silver syringe with tips F14-2628BS· Rubber block F14-3082TL
- Fine steel brush F14-3073TL
- Jeweler’s files F14-2022TL
- Teflon sheet F14-3083TL
- Agate burnisher F14-3069TL
- Acrylic roller F14-3070TL
- Torch F14-3067TL
- Fiber block F14-3068TL
- Fiber blanket F14-3074TL
- Kiln F14-3066TL
- Utility knife
- Rubber stamp
- Cocktail straw
- Fine-tipped paintbrush
- Safety goggles
- Olive oil
- 2 stacks of playing cards – stacked 4 cards high
Instructions
1. Knead 25 grams of clay with your fingers, for 20-30 seconds, to condition the clay.
2. Put the clay onto the Teflon sheet. Place a stack of cards on either side of the clay. Using the acrylic rod, roll out the clay until it meets the height of the playing cards.
3. Gently place the stamp upside down onto the surface of the clay. Using the utility knife, trim the clay to match the wooden side of the rubber stamp. Remove the stamp.
4. Rub a little bit of olive oil over the rubber stamp image to help prevent the clay from sticking to the rubber. Turn the rubber stamp over and press firmly and evenly to impress the image into the clay. Remove the stamp.
5. Using the straw, press down in the left corner of the clay then remove the clay, and the circle you just cut out. The hole you’ve made will be used to attach a jumpring later.
6. Use the syringe to apply embellishments to the clay pendant. Hold the syringe in the palm of the hand and use the thumb to press on the plunger of the syringe so the clay is evenly expelled. Use a fine-tipped paintbrush to manipulate, smooth or move the clay applied with the syringe.
7. When embellishment is completed, dry the pendant in a dehydrator, on a hot plate or naturally overnight. To check the clay for moisture, place the pendant on a piece of black plastic, or on a piece of glass to check if the piece is dry – if any condensation appears, let the piece dry longer.
8. When bone dry, place the piece on the rubber block – the rubber block will cushion the fragile clay while refining. Use the files to clean scratches, remove any excess clay or unwanted imprints.
9. Place the piece into the kiln. Fire the kiln to 1250° and hold at that temperature for 30 minutes; let cool to room temperature.
10. When the firing is complete and the piece is cooled, brush the surface with a fine steel wire brush. Brush in one direction as the brush leaves fine scratch marks on the silver.
11. Select your finish. Leave the pendant with a matte finish as it appears once brushed; use an agate burnisher to burnish the pendant to a mirror finish; use wet/dry sandpapers to bring more luster, or tumble the pendant in a rock tumbler to give an even, mirror shine.