| www.beadsbaublesandjewels.com BBJ – the source for jewelry making, beading, and metal work: instructions, education and projects from leading jewelry designers, and instructors. The online home of the public television program. |
| 1703-2 | Print | Close [X] |
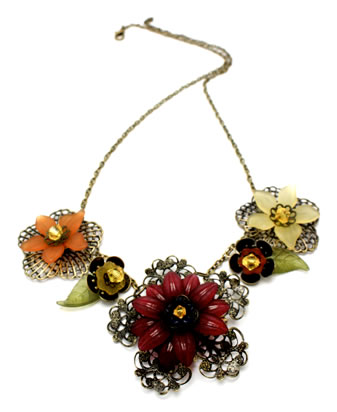
Dale Nicholson layers brass and resin flowers with crystals for added drama.
|
For More Information Visit: www.eksuccessbrands.com  www.eksuccessbrands.com |
Flowers & Brass Statement Necklace Time required: 1½ hours Intro Copy: Layer acrylic flowers with delicate brass stampings into great accent pieces to shape. Finish off the centers with crystals from Create Your Style with Swarovski Elements and your necklace will shine! What You Need: Laliberi™: Other supplies: Tools: What To Do: Make each element following this process: Cut a 10” piece of wire. Thread a 6mm crystal bead on to the middle and then fold the wire in half, twisting the wires together a few times to secure the bead in place. Thread this captured crystal through all the centers of the stacked layers. Twist gently and then separate the wires opposite of each other. Poke each of the ends up so that it is between the next layers. Twist the wires in opposite directions to secure in place; trim the ends. Note: when attaching the leaves, make an additional twist to allow the leaves to be positioned in the direction you need them to lay best. Assemble each element together using jump rings to attach each to the chain. It’s best to plan out the placement in advance before you start assembling. Start the assembly working from the large element out along each side. For the necklace to lie flat, it might require cutting and attaching the chain between elements. Project Tips, Notes, & Techniques: When planning your stacked and layered components, remember to allow the center crystal to take center stage and sparkle! Take care to be sure how all the colors look together and that the contrast is complimentary to the overall design.
|
Dale Nicholson & Katie Hacker |