TRIAD
Modified flat right angle weave with seed bead embellishment
By Leslie Rogalski
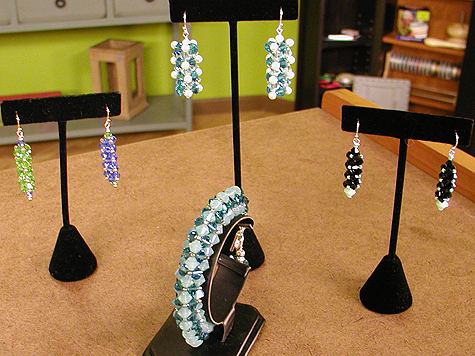
Swarovski crystal bicones are shaped perfectly for flat right-angle weave. In this design a flat RAW strip of bicones is folded into a 3-sided pyramidal column, to which seed beads are added in a technique often called "stitch in the ditch.". Use this 3-sided, tubular form in your choice size of crystals for earrings, a toggle bar closure, or even a bracelet.
Skill level: Intermediate: Familiarity with flat right angle weave will enable best results but illustrations are stepped out for advanced beginner stitchers who may be new to this technique.
WHAT YOU NEED:
Swarovski jet bicones
Swarovski round crystals (to place at the ends of the tubular column)
Size 11° seed beads (to stitch in the ditch) cylinders or round, both work
Beadalon WildFire beading thread .006 color to blend with crystal color
Size 10 hard beading needle
Scissors
For earrings
2 ball end head pins
4 accent crystals same size or larger than crystals used in RAW
round nose pliers
2 ear wires
For toggle bar:
2 accent crystals same size or larger than crystals used in RAW
2 seed beads
For bracelet:
2 accent crystals same size or larger than crystals used in RAW
Beadalon beading wire, 19 strand .018 or .015
2 Beadalon wire guardians
2 crimp tubes
2 crimp covers
1 Beadalon clasp set
round nose and chain nose pliers
crimp pliers
wire snips
FIGURES 1-10
Flat right angle weave strip
Step 1. Use a 4' length of WildFire. Use bicones to work a flat right angle weave strip to desired length by 2 units wide. Illustrations show a strip 3 units long by 2 units wide, a good size for earrings.
TIP: Making a toggle bar? Make sure it is long enough to remain in your toggle ring (See Bling Ring-o-rama Toggle ring project) but not so long that it won’t fit. For a bracelet make a length as long as desired leaving and allowance for your clasp, to be crimped onto a wire strung through the tube. IDEA: make it long enough to fit onto Beadalon Memory wire! Use the larger size oval bracelet wire since this triad stitch is dimensional and takes up room.
FIGURES 11-15
Zip the strip into a 3-sided tube
Step 2. Fold the strip lengthwise forming a long tube. Zip the tube together working flat right-angle weave, stringing new bicones to complete each unit of 4 as you close the tube.
FIGURE 16
Add seed bead embellishment
This step's stitch path enables the seed beads to all sit facing the same direction, with holes facing horizontally around the tube. Each "round" uses 3 seed beads, stitching them "in the ditch" between bicones.
Step 3. Round 1: With your thread exiting one end bicone (shown at the top in Figure 16) string 1 seed bead (Figure 16a) and pass through the next bicone. String the second seed bead (b) and pass through the next bicone. String the third seed bead (c) and pass through the bicone first exited in this round.
Step 4. Step to the next round. Following the existing thread path pass around (counterclockwise) through two bicones as in RAW.
Step 5. Round 2: String seed bead d. Pass through the next bicone. String seed bead e (unseen in rear of diagram). Pass through the next bicone. String seed bead f.
Step 6. Step to the next round. Following the existing thread path pass around (clockwise this time) through two bicones as in RAW.
Step 7. String the seed beads between bicones as in Steps 3 and 5, continuing to step to the next round by following RAW thread paths. Remember to pass through the first crystal in each round to complete the circuit of stitched seed beads but DO NOT pass through the first seed bead added; this will skew the orientation of the bead.
Step 8. Weave in the end to secure and trim.
DESIGN TIPS:
For earrings: On a ball-end head pin string 1 seed bead and 1 bicone or other Swarovski crystal accent. String 1 finished triad. String a second accent crystal and seed bead. Make a wire-wrapped loop to snug the accents to the crystal. Add ear wires.
For toggle bar: Use needle and doubled thread to add a picot tip of a crystal and seed bead on each end of the triad tube. Pull snug and secure but do not trim. Weave through the tube to exit one crystal in the middle. String enough seed beads to make a stem that allows the toggle to rotate for passage through the toggle ring. Attach to your cuff or necklace; pass back through the stem beads into the other end of the crystal you exited. Secure thread and trim.
For bracelet: Cut a piece of 19 strand Beadalon .018 or .015 beading wire 4" longer than your desired finished bracelet length. On one end crimp one part of your clasp using a Beadalon wire guardian. (Do not use more than 2" of wire or you will leave yourself short at the other end.) String 1 accent crystal. Carefully thread the wire through your triad tube. Finish by crimping the other clasp using the wire guardian.
Make sure the tube is snug within the wire, but not so snug that it wont be flexible enough to bend around your wrist. Finesse it!
|