| www.beadsbaublesandjewels.com BBJ – the source for jewelry making, beading, and metal work: instructions, education and projects from leading jewelry designers, and instructors. The online home of the public television program. |
| 1810-1 | Print | Close [X] |
Mary Hettmansperger shares techniques for using buttons in cold connections metal work.
|
For more information about Mary Hettmansperger visit |
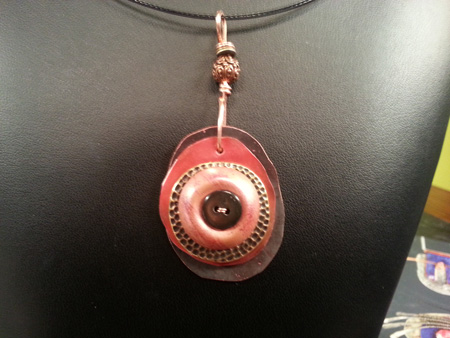
Mary Hettmansperger Mary shows the options and techniques for using 2 hole and shank buttons as a component in cold connections metal jewelry.
Materials: Tools:
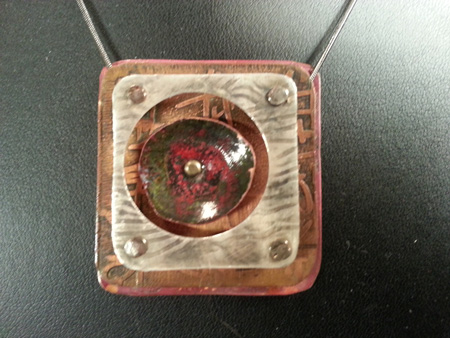
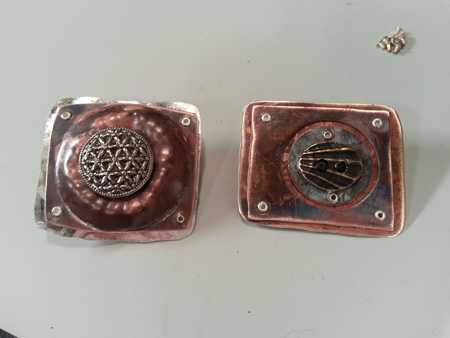
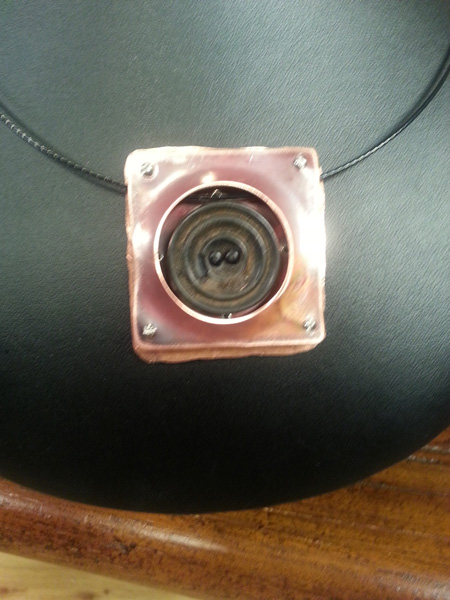
Step #1 – Cut 3 squares - 2 ½ inches on all 4 sides, out of 24 gauge copper to use for the back, middle and front of the necklace.
Step #2 - Heat the pieces of copper to anneal it - (make it soft and pliable). Then quench the shape in the bucket of water to cool. You can also use flux and a rubber stamp to create pattern on the metal by putting a thin layer of flux on the rubber stamp using a paintbrush. Then heat the metal to a glowing color and quench very fast in water. Step #3 – Once the copper sheet is annealed, – Take the top square and using the disc cutter cut a circle opening in the center of the piece. Hammer the edges of the metal to create an organic edge, then and use steel wool to make the side smooth and burr-free. Step #4 – Once the pieces are textured and heated, then you can begin to assemble the necklace. On the front metal piece that has the window, punch 4 holes in each of the corners. Step #5 – Take the Button and attach it to the center piece of metal using the 2 brads, centering the button on the middle piece to show through the window on the front. Step #6 – Very carefully – line up the 2 metal pieces and using the front holes as a pattern, punch the second set of holes. Step #7 – Again, being very exact, line up the last square and punch the final 4 holes. Step #8 – Once the holes are all punched, take the 4 bolts and insert them in the front piece holes. Then continue by adding 2 spacers to each bolt, followed by the middle metal piece with button attached in center. Finish by adding 1 more spacer, then the back piece and the nut to secure. Once all 4 bolts are tight and secure, cut the bolt flush with cutters and dot clear metal glue over the connection to assure that it will not unscrew. Step #9 – Thread a chocker necklace between the front and middle layer where there are 2 spacers were placed.
|
Mary Hettmansperger & Katie Hacker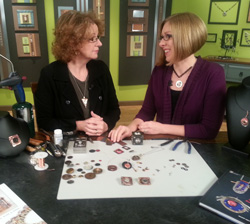 |