
Project 208-2
Beading Lesson
Using Memory Wire
By Katie Hacker
Sponsor:
Beadalon®
 Memory
wire makes it easy to make necklaces, bracelets and rings. This beading
lesson will tell you everything you need to know about using memory wire.
Memory
wire makes it easy to make necklaces, bracelets and rings. This beading
lesson will tell you everything you need to know about using memory wire.
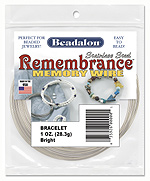
Memory wire is tempered wire that "remembers" its shape and retains its coiled form. It's basically one-size-fits-all and comes in pre-formed necklace, bracelet and ring sizes. You don't have to use a clasp to connect the ends because they automatically stay in place on your neck, wrist or finger.
Memory wire is typically made from tarnish-resistant stainless steel and now it's also available in silver and gold-plated. The plated memory wire gives you a whole world of new design possibilities.
 To cut
loops of memory wire, use shears that are made especially for hardened
wire. Do not use ordinary wire cutters because the memory wire will cut
into the blades and ruin them. We recommend using about 1 1/2 or 2 loops
for a memory wire choker and 2-3 loops for a bracelet.
To cut
loops of memory wire, use shears that are made especially for hardened
wire. Do not use ordinary wire cutters because the memory wire will cut
into the blades and ruin them. We recommend using about 1 1/2 or 2 loops
for a memory wire choker and 2-3 loops for a bracelet.
There are a couple of ways to finish the ends. To make a loop, use round nose pliers to grasp the end of the wire and turn it. It is easier to bend if you go against the natural curve of the wire. You can add a few beaded head pins to the loop to dress it up a bit.
For a more professional-looking finish, use end caps, which are available in a variety of shapes. Place a drop of epoxy or super glue on the end of the wire and press an endcap onto the wire. String a few beads, then spot-glue the last few beads together to help hold the end cap in place. If you use an end cap with a loop, you can add a decorative beaded charm to the loop.
As you add beads to the wire, it's important to keep the wire in its natural shape. Don't pull the wire straight, or the ends may bounce back and the beads will fly off of the wire.
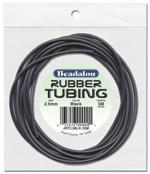 Rubber
tubing is a fun way to dress up memory wire designs. It's available in
different diameters and you can use it to highlight a special bead or
unusual pendant. The great thing is, the beads don't need to have large
holes like they would if you were stringing them onto cord. You can string
smaller-hole beads directly onto the wire, then cover the wire on both
sides. That way it looks like the tubing is going all the way through
the beads, even though it really isn't. You can get a similar effect by
cutting the rubber tubing into shorter lengths and using the pieces as
spacers between beads.
Rubber
tubing is a fun way to dress up memory wire designs. It's available in
different diameters and you can use it to highlight a special bead or
unusual pendant. The great thing is, the beads don't need to have large
holes like they would if you were stringing them onto cord. You can string
smaller-hole beads directly onto the wire, then cover the wire on both
sides. That way it looks like the tubing is going all the way through
the beads, even though it really isn't. You can get a similar effect by
cutting the rubber tubing into shorter lengths and using the pieces as
spacers between beads.
You can also make some really cool double-strand designs by using spacer
bars or two-hole beads to separate the wires.