| www.beadsbaublesandjewels.com BBJ – the source for jewelry making, beading, and metal work: instructions, education and projects from leading jewelry designers, and instructors. The online home of the public television program. |
| 2105-2 | Print | Close [X] |
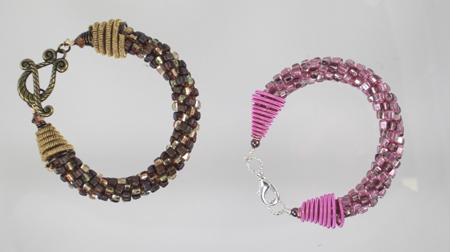
Sandra Lupo shows how to set up a Kumihimo board to create a braid finished with cones and a clasp.
|
For More Information Visit:
|
BEADED KUMIHIMO BRACELET WITH CONETASTIC CONE ENDS Conetastic Cone Mandrel Tool Set is licensed to Beadalon by Sandra Lupo, Inventor
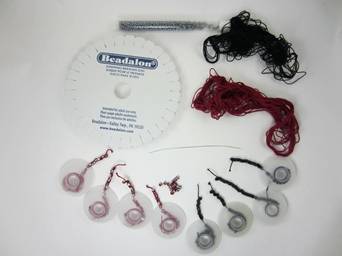
Materials and Tools List: --Long beading needles (big eye) to thread #8/o and #5/o beads onto cotton perle STEP 1: Cutting Thread lengths: Cut a minimum 24” x 8 to yield a 6” braid. NOTE: For longer bracelet, 5 additional #5 beads on each of 8 strands will yield approximately 1 inch. STEP 2: Stringing the Beads: before placing cut threads on the board in the designated pattern string your 8 cotton perle strands with: NOTE: At the end of each strand, tie a knot below the last #8 bead to stop beads from falling off or use an additional #5/o as a stop bead.
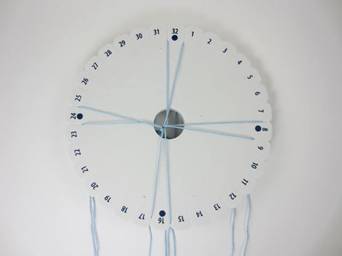
Image 1 (materials to braid) STEP 3: Tying the 8 strands together to begin placement on the board: NOTE: Kumihimo board instructions offer different patterns. This bracelet shown in both Basic One Color Pattern and two Color Spiral Pattern. Refer to your board instructions and see specific placement for this pink and mauve bracelet in Step 4. STEP 4A: Set Up for Basic Pattern for one Color IMAGE 1A (placement of threads according to board instructions)
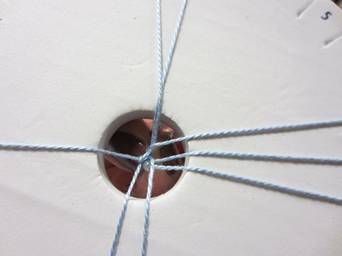
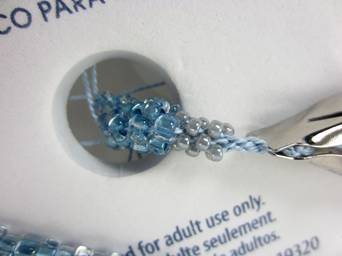
IMAGE 1B (set up board with beaded threads spools each side of dots) OR STEP 5: Beginning the Braid IMAGE 2 (braided thread as shown from underside of board) Then begin weave with the 8/o beads on each of the 8 strands (one at a time until all 8/os are woven in. NOTE about Securing the Bead in the Braid: Place each bead down into the board hole and under the top 2 parallel threads. Hold that bead in place and cross its thread over the two threads and place that thread into the proper numbered slot
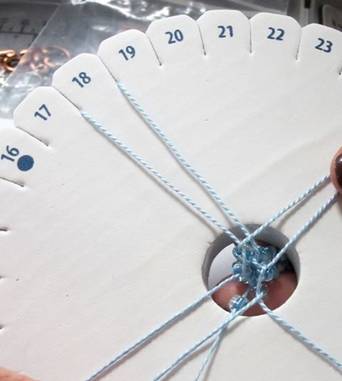
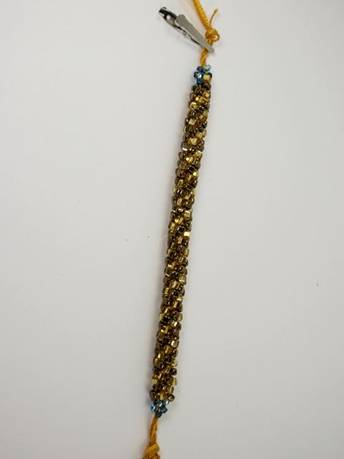
IMAGE 3 (bring the 8/o bead down under and between two threads) IMAGE 4 (bring 5/o’s down and under and between two threads) STEP 6: Finishing the Braid
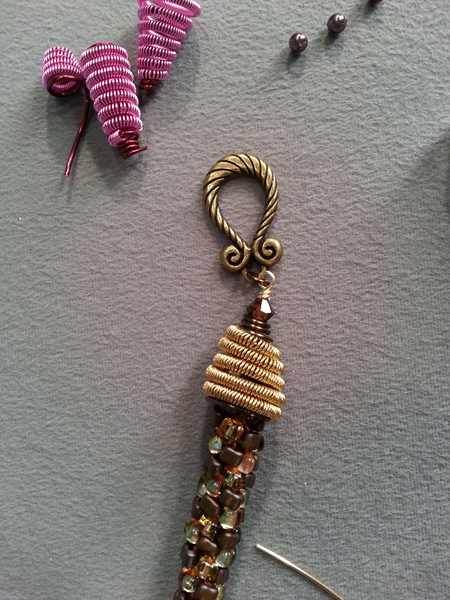
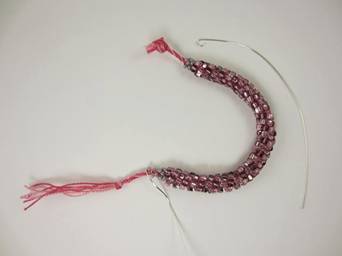
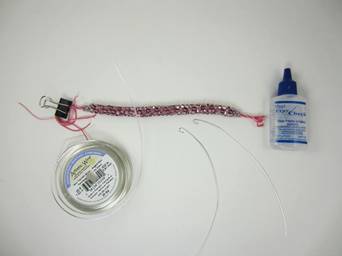
IMAGE 5 (8/o’s first and then 5/o’s in beginning braid) At this end, braid threads with no beads for another 1/4 inch as done in Step 5. IMAGE 5A (finished braid removed from board) STEP 7: Preparing the ends for Conetastic cones IMAGE 6 (wire inserted into end of braid at 8/o beads) Tightly wrap the wire around the braid 3-4 times IMAGE 7 (cut threads and glue with wire in place) Repeat for the other end of the braid. Set aside to let dry For more information visit www.sandsstones.com
|


Sandra Lupo & Katie Hacker |