406-5
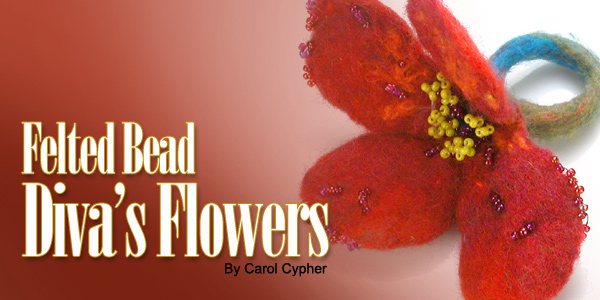
Felted Bead Diva’s Flowers
By Carol Cypher
When I reveal to knitters that I am a felt maker, they frequently tell
me of the hat or tote they felted, by first knitting and then laundering
or “shrinking” the item in hot soapy water. (At the peril
of sounding haughty, these beautiful items are actually fulled, not felted.)
Consider the instant gratification of creating an item directly from wool,
without the necessity of first spinning it into yarn and then knitting
the yarn into fabric. Indulge in the spontaneity, creative possibilities
and painterly approach of working with a rich palette of dyed wool fiber.
Create a felt flower to wear on your lapel or hat using this easy and
accessible feltmaking technique. Make it realistic or fantastical, embellish
it with beads, or not.
finished size: 4” x 4” to 8” x 8”
Ingredients:
merino wool roving in 3 to 5 colors per flower, totaling ¾ to one
ounce per flower
(optional bits of yarns and threads to incorporate into the felt)
Equipment:
10 inch square of bubble wrap
10 inch square of high density plastic (veg/market bag that rustles when
touched)
retired knee high or pantyhose leg cut into strips
tea towel or dishcloth
10 length of pipe insulation
6 drops of Murphy’s, castile, ivory or other soap in 1 cup of hot
water
Notions:
scissors, beading needle, thread that fits into the needle’s eye,
assorted seed beads, safety pin, pencil or skewer or knitting needle
Directions:
Place the bubble wrap on your worktable or countertop, smooth side up.
<<To use the wool roving, hold it softly with hands at least 6 inches
apart. Pull in opposite directions and the fibers will drift apart. Pulled
from the tip of the roving, wispy fluffs of wool, like brush strokes of
paint, can be layered to produce a painterly effect. If the colors are
of similar value, they appear to blend. If disparate values are layered,
a webbed and veined appearance is achieved.>>
1) Layout the flower:
Lay wisps of green wool in a 5 petal design on the smooth side of bubble
wrap. This is the calyx. Imagine a circle the size of a dessert plate
(8” diameter) on the bubble wrap. Fill in this circle with overlapping
wisps of about a ¼ of the wool, with all fibers arranged horizontally.
Place a second layer of wisps on the first, with all these fibers perpendicular
to those of the first layer. About ½ of the wool remains.
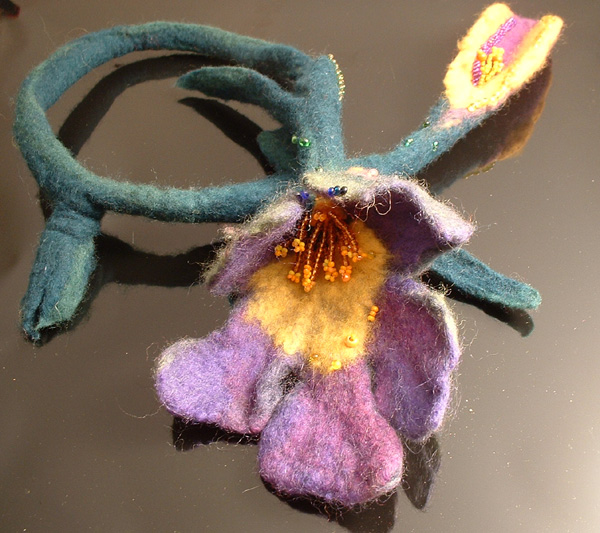
Use the remaining wool in a painterly fashion. Perhaps wisps will radiate
from the center, perhaps the edges will be of a different hue, maybe yellow
or black will dominate the center. Use the play of color to mimic your
favorite flower or create one from your imagination. (for example, a yellow
center with purple petals, veined in navy like pansies, violets and irises;
or a red circle with black center like a poppy)
To incorporate bits of yarn, place the yarn in a way that allows the wool
beneath to still show. Pull gossamer, thin, spider web-ish wisps to place
on top of the yarn inclusions. This way, the wool beneath, felts with
the wool on top, capturing the inclusions in the process.
2) Begin the felting:
Place the tea towel beneath and beyond the bubble wrap. Sprinkle the wool
with the hot soapy water. Cover it with the high density plastic.
Press down on the plastic with one hand, holding it stationary as you
slide your other hand over the plastic’s surface, to spread the
water throughout the wool. DO NOT PAT, PEEK BENEATH or MOVE THE PLASTIC
or wool beneath it. Your mission is to simply press out the air and wet
down every fiber of wool to facilitate felting.
When certain that the water is spread throughout, keep one hand on the
plastic, holding it stationary, while softy rubbing with the flat of your
hand, in large circles. This causes the wool to felt. The water has lifted
the cuticle of the fiber (like scales on a roof), your pressing brings
the fibers so close together that they rub on each other. Then, when the
cuticle closes again, it will hook onto neighboring fibers … hence,
felt. Rub for 5 minutes or so.
Place the pipe insulation on the edge of the bubble wrap/wool/plastic
layers. Roll it up tightly and secure the bundle by tying with a knee
hi or pantyhose leg. Do not knot. (An easy alternative to a bow is to
tie once very tightly, then switch the direction of your grasp and without
adding another tie, just pull hard.)
Roll the bundle back and forth using your entire flat hands, gently as
not to disturb your beautiful design. Roll back and forth about a hundred
times.
Unroll, place pipe insulation of another of the 4 edges, re-roll and tie.
Roll this back and forth a hundred times. Increase pressure while repeating
this for all 4 edges.
3) Fulling (the second stage of feltmaking that compacts and condense
the fibers into a denser fabric through further manipulation and pressure):
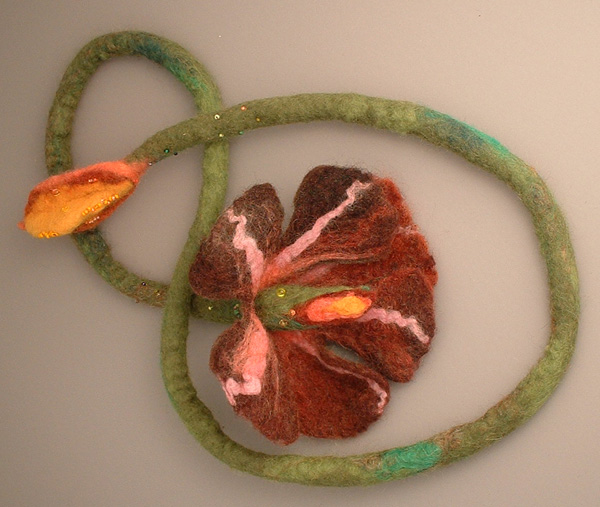
Unroll the flower and decide on shape. Decide whether to use as is for
a poppy look, cut into 4 or 5 petals, or slash several times for a mum
look. Be cautious when cutting.
If you’ve done any cutting, re-roll and tie the bundle again and
roll it a hundred times or so to soften and taper the cut edge. Separate
the petals if they start to felt together. Reroll and tie and roll it
back and forth again….
4)Transforming the flower from 2 to 3 dimensions:
Drape the plastic-topped flower over the pencil, skewer or knitting needle
like one of those tiny cocktail umbrellas. Secure the bundle with the
tie. Roll this back and forth over the bubble-side-up several times. If
the plastic falls out, stop and re-do it immediately or, it may felt shut
into a bud (which is very cool only if that is your intention). Use more
pressure and gusto now. If a bud is desired, work it extensively while
tied like an umbrella.
<<Working the flower this way is shortening each concentric circle
of the flower, as though you pulled on rings of tiny basting stitches.
It makes the flower begin to cup. More work, deeper the cup.>>
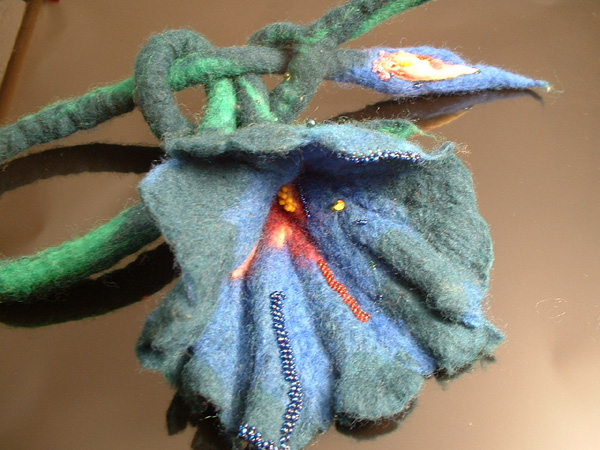
Regard the flower’s shape. Fold it; pull the edges back; turn them
under; pull every other petal forward or back; rather than having the
center recede, poke it forward like a cone-flower. Does the flower say
poppy, daisy, mum, orchid?? Each manipulation provides a new possibility.
Rinse and squeeze it under hot water, if possible. Place within the folds
of a bath towel and stand on it to remove the excess water. Re-shape the
flower and permit it to dry. It will have memory for the shape.
5)Bead the flower:
Embellish your flower using seed beads to create stamens or add dense
spots of light and shine to the matte softness of the felt. Use embroidery
stitches, fringe techniques or simply sew one bead on at a time. Carry
the thread within the felt rather than allowing it to show on back.
Use the safety pin to wear it on your lapel, hat, or purse. Their use
extends beyond wearable. Consider making several for floral arrangements
and other decorative purposes. For a wedding at the Conservatory in Pittsburgh,
I felted and beaded all the flowers: boutonnieres, centerpiece arrangements
for the banquet tables at the reception and the glass and felt flowers
for the head table.
For more information about felting, visit: www.carolcypher.com
| Project Images | |
|
|