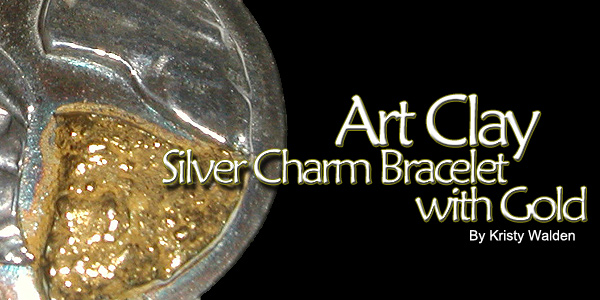
412-1
Art Clay Silver Charm Bracelet with Gold
By: Kristy Walden
How To TV Online subscribers,
Watch the video for this
project online at howtotvonline.com

50 grams Art Clay Silver Low Fire Slow Dry F14-2628BS
Silver Paste 20 gm Low Fire F14-2130BS
Accent gold F14-2629BS
Acrylic roller F14-3070TL
Non stick worksheet F14-3083TL
Texture plates F14-3071TL
Files F14-2022TL
Rubber block F14-3082TL
Straight burnisher F14-2025TL
Agate burnisher F14-3069TL
Steel wire brush F14-3073TL
Fire block F14-3068TL
Butane torch F14-3067TL
Fiber blanket F14-3074TL
Kiln F14-3066TL
Liver of sulfur F14-3085TL
Jump rings F14-1990FD
Bracelet chain F14- 3896JW
Chain nose pliers F14-1606TL
Water, spray bottle, & bowl
Olive oil
Playing cards
Circle template or cookie cutters
Light bulb and holder
Make up spongers
Emory board
600-grit sandpaper
Butane
Timer
Tumbler
Plastic wrap
Starting Tips:
Have all the tools positioned around the work space and know the process
before opening the clay, this will help keep the clay fresh. Put olive
oil on the light bulb—just a little—and on the texture plate,
then on your fingers to act as a resist to the clay.
The playing cards are ½ mm thick.
Most important tip—80% of you work is done before you fire.
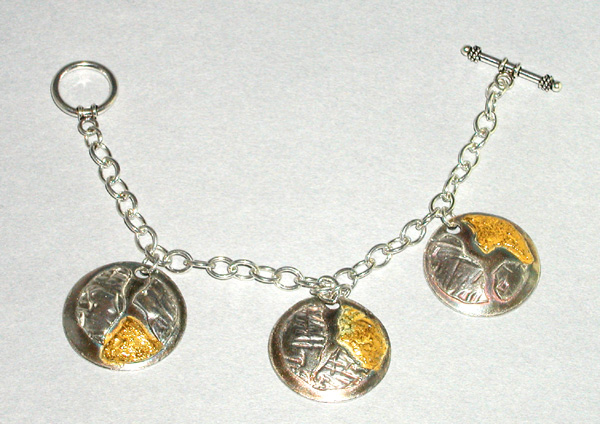
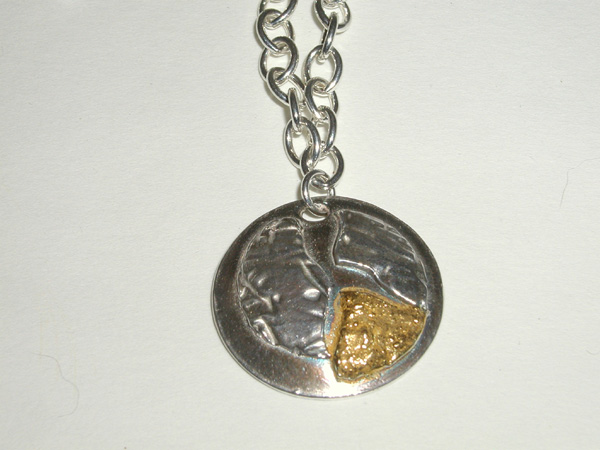
Creating the Charms
Step 1: Take the clay out of the wrappers and knead it as if playing with
gum. Feel the clay get warmer and softer, almost rubbery. Press the lump
of kneaded clay into a circle and place on the non-stick work sheet.
Step 2: Stack two stacks of playing cards, 6-cards or 3mm high – place a stack on either side of the clay – these will help maintain an even thickness of clay across the whole sheet. Roll across the cards and the clay with the acrylic roller. Pick up the clay and reposition so, as you roll it further, you make it large enough to fit the template.
Step 3: Place the template over the rolled out clay. Use the stylus to trace around the inside of the template. Remove the template, then remove the excess clay. Wrap the excess clay in a plastic wrap to keep moist. Press the straw into the cut-out circle, near the top but not too close to the edge, making a hole for the jump ring to link through later.
Step 4: Place the circle of clay on top of the light bulb and press with the palm of your hand to mold to the light-bulb shape.
Step 5: Place a little olive oil onto the texture plate if you haven’t done so already. Slightly knead the left-over clay, and place on the non-stick work sheet. Reposition the cards (still 6 high) on each side of the clay and roll. Take away two cards from each stack, place the texture plate on top of the clay and the 2mm cards, then roll in the texture.
Step 6: Choose a circle template that is smaller than the one used in Step 3. Place the template onto the rolled-out clay. Use the stylus to trace around the template. Remove the template then remove the excess clay. Wrap up the excess clay so it doesn’t dry out. Using the stylus, cut the textured circle into three pieces.
Step 7: Using the paint brush, apply a thin layer of water onto the surface of the circle resting on the light bulb. Position the three textured pieces of clay onto the circle on the light bulb; remember to keep the hole open on the foundation circle. Press the sections lightly – the water and the light pressure will help ensure a good bond between the two layers.
Step 8: Repeat steps 1 through 7 until you have 3 circular charms.
Step 9: Let the clay dry on the light bulbs for about 2 hours. Be gentle when you pop the clay off the light bulb; you can feel when the clay is dry enough to continue.
Step 10: Be careful to use a gentle touch as the clay is fragile in the green-ware state. Refine the charms using sand papers and files. Once you’ve refined all the edges, carefully rub the charms against your clothing, or a piece of fabric, to make sure they don’t snag the material. Use Art Clay Paste to repair any cracks, fingernail marks or scratches. Re-dry and sand with 600-grit sand paper. Refine the back of the charms as well.
Step 11: When satisfied with the charms, use a moist make-up sponge to smooth the edges and sanding scratches. Re-dry the charms on the light bulb to be sure all the water has evaporated.
Step 12: Fill the torch with butane. Position one dry charm on a dome shaped bed of fiber blanket. Ignite the torch and direct the flame at the charm, moving it in a circular motion. The stages of firing are: smoke, then fire – which is the clay’s binder burning off, the clay turning brown, then white, then a salmon glow. Keep the clay at the salmon glow for 2 minutes, watching closely not to scorch or burn the clay. The signs of burning are when the clay starts to turn silver and then melting. Let the charm cool down naturally - don’t quench in water. Repeat the firing for all three charms.
Applying the Gold Overlay
Step 13: When the charms are cool, don’t brush the charm with the
steel brush, as you might with other projects, and don’t touch the
area where you are putting the gold overlay. The gold needs the tack from
the fire scale to adhere and grab to the silver and any oils or dirt from
your hand will prevent this bonding. Use a clean hair-bristle (not synthetic)
paint brush to apply the gold paint in three thin layers. Let the gold
dry between the layers and for about two hours before firing.
Step 14: Fill the torch with butane and begin firing the charm. Bring the clay to the salmon color, set a timer for accuracy, and with raising and lowering the flame; keep the salmon color for a full 7 minutes. Let cool naturally – no quenching. Repeat for all three charms.
Step 15: Once the charms are cool, brush the fire scale off the silver, only. Be careful not to brush and scratch the gold.
Step 16: Use a steel or agate burnisher to burnish the gold and silver areas. Then place all three charms into the tumbler. Tumble until the desired shine is achieved.
Step 17: If you’d like to add a patina to your charms, dip them in a bath of liver of sulfur, following the manufacturer’s directions. If you’d like, try painting the liver of sulfur onto just the textured area to highlight the depth of the texture.
Step 18: Add the jump rings to the charms and attach the charms to the
bracelet chain.
| Project Images | |
|
|