
501-1
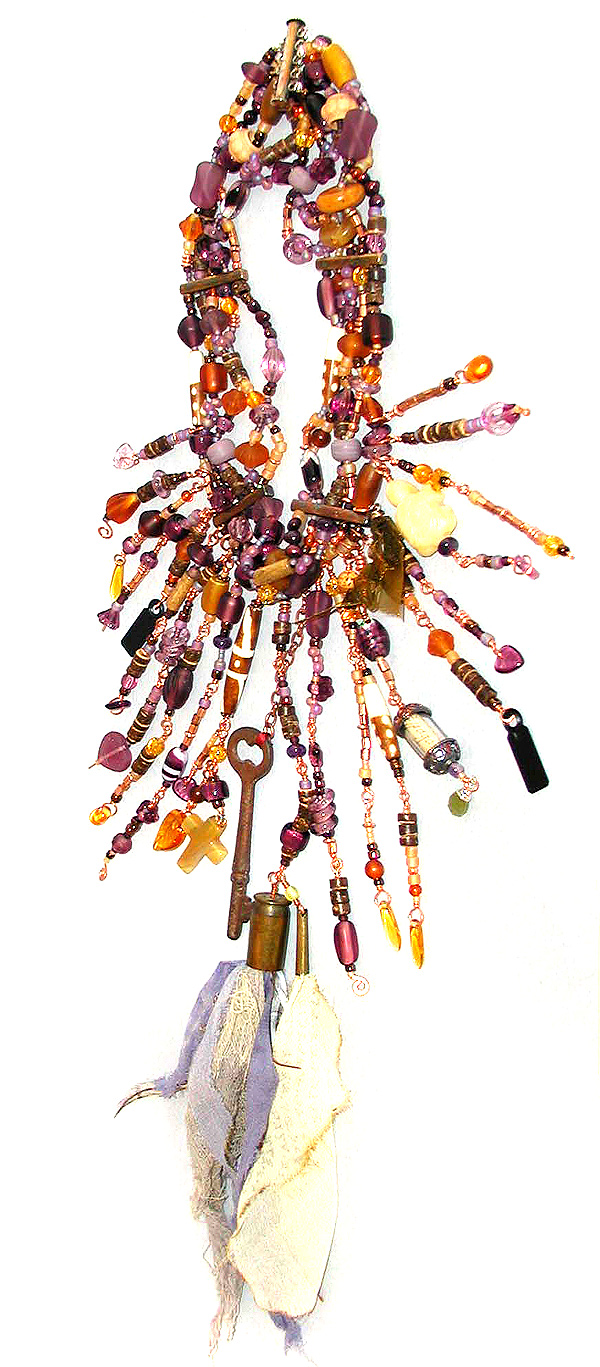
Chatelaine, 1584
By Louise McClure
Inspired by local legend and the power of place, it recounts the story of the lost colony of Roanoke Island. A tribute to individual courage, a chronicle of the birth of the first English child born in the New World and the mystery surrounding the disappearance of the entire colony over 400 years ago.
The term Roanoke was used by Virginia colonists to designate shell beads or wampum, a form of bead made from clamshell, used in trade. An exchange of goods, materials and ideas between cultures.
The key motif is symbolic of the mystery and suggests passage. Doors locked or unlocked?
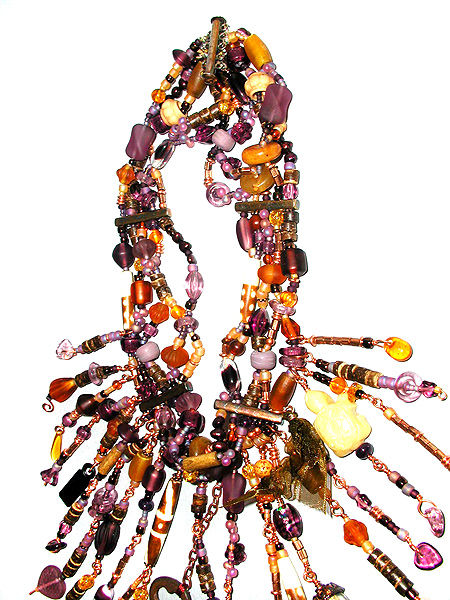
This necklace is made using very simple techniques of stringing &
knotting, wire wrapping to form links, and cut & paste methods to
attach bits of fabrics, feathers and fibers. The choker portion of the
piece is strung on five strands of three-ply nylon cord in two colors.
Each stone and bead is strung individually and the strands interwoven
to create a visual and physical balance. Sterling silver spacer bars provide
structural support. The clasp is a five strand sterling silver slide.
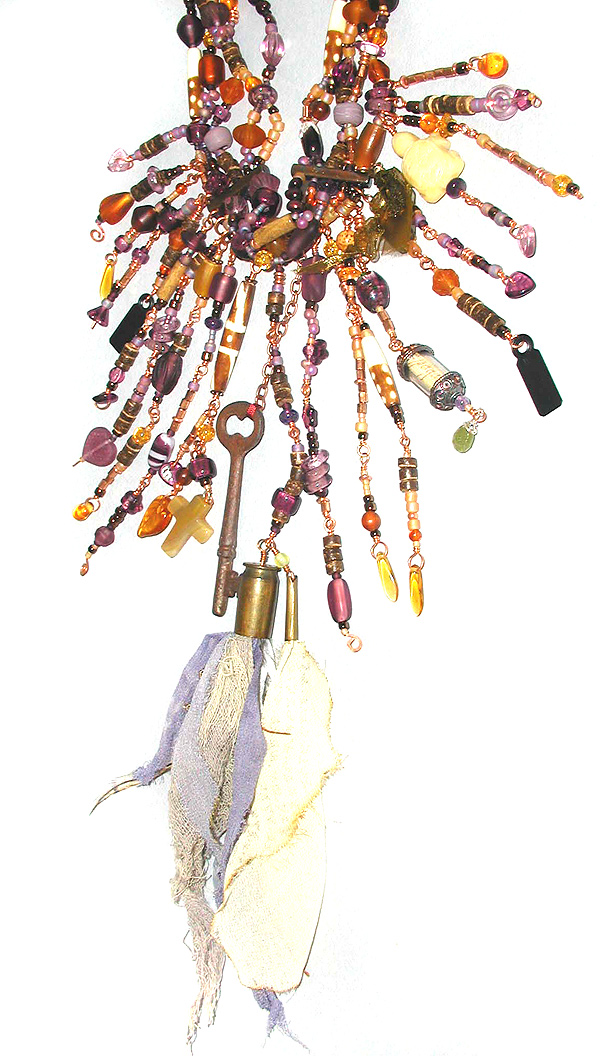
The chain fringe is graduated in length and formed of multiple links attached
to the last strand of the choker with copper jump rings. This gives the
piece maximum movement and kinetic energy. The color palette is a subtle
shift from copper through gold and amber into violet and deep aubergine;
the colors of twilight skies reflected in the brackish water of the Albemarle
Sound.
Total length: 15.5” (39cm) with graduated fringe, 5” (13cm)
long at center front of neckpiece.
Material needed
1 spool Silkon cord, size #2 dk. Brown F14-1085BS
1 spool Silkon cord, size #2 lt. Brown F14-1082BS
1 spool 22-gauge wire, natural copper F14-1124WR
1 5-strand slide lock clasp, sterling silver F14-5958FN
4 5-strand spacer bars, sterling silver F14-5931FN
10 Crimp beads, sterling silver 2 x 2mm F14-2185FD
10 Crimp covers, sterling silver 3mm F14-6899FD
1 6’o seed beads, frosted AB amethyst F14-5938SB
1 11’o seed beads, frosted AB purple F14-4873SB
1 pkg. 11’o seed beads, matte transparent amethyst F14-1904SB
1 strand cultured freshwater pearls, rounded flat sided, dyed purple,
5-6mm F14-1424PL
1 strand Czech pressed glass twist, amethyst, 15 x 10mm F14-6213MD
1 strand fluted, frosted glass rondelle, purple, 9mm F14-2900GB
1 pkg. transparent glass with foil, purple, 12 x 9mm F14-5880GB
1 strand faceted, glass double cone, lavender, 11 x 9mm F14-2412MD
1 strand faceted, glass double cone, amethyst, 11 x 9mm F14-2413MD
1 strand Czech pressed glass oval, opaque purple/white, 13 x 7mm F14-7268MD
1 strand Czech pressed glass oval, transparent purple/clear, 13 x 7mm
F14-7261MD
1 strand Czech pressed glass star, transparent amethyst, 6mm F14-3113MD
1 strand Czech pressed glass star, transparent amethyst, 8mm F14-3213MD
1 strand Czech pressed glass heart, amethyst, 6mm F14-3613MD
1 strand Czech pressed glass fluted round, lavender, 6mm F14-1612MD
1 strand Czech pressed glass fluted round, amethyst, 6mm F14-1613MD
1 pkg. fringe beads, matte rainbow lavender F14-4405SB
1 pkg. Czech pressed glass ring, lavender, 10mm F14-6812MD
1 pkg. Czech pressed glass ring, amethyst, 10mm F14-6813MD
1 strand Czech pressed glass spiral oval, frosted purple F14-7552MD
1 strand glass crow beads, opaque plum, 8 x 6.5mm F14-1786GB
1 strand roller crow beads, amethyst, 9 x 6mm F14-4213MD
1 strand amethyst rondelle, natural, 6mm F14-7457GS
1 pkg. Czech pressed glass flower cone, amethyst, 8 x 6mm F14-3032MD
1 pkg. Czech pressed glass flower cone, amethyst, 8.5 x 8.5mm F14-6413MD
1 pkg. Czech pressed glass flower cone, lavender, 8.5 x 8.5mm F14-6612MD
1 pkg. Czech pressed glass flower cap, lavender, 7 x 7mm F14-6512MD
1 pkg. Czech pressed glass flower cone, amethyst, 8 x 6mm F14-3013MD
1 pkg. Czech pressed glass flower cap bead, amethyst, 10 x 10mm F14-6613MD
1 strand Czech pressed glass leaf, transparent lavender, 9mm F14-2712MD
1 strand Czech pressed glass leaf, transparent amethyst, 9mm F14-2713MD
1 strand glass roller crow, amethyst, 6 x 4mm F14-4113MD
1 strand Czech pressed glass leaf, lavender, 18 x 13mm F14-2812MD
1 strand Czech pressed glass leaf, amethyst, 18 x 13mm F14-2813MD
1 strand Czech pressed glass heart, frost lilac, 14mm F14-7518MD
1 pkg. glass bead assortment, matte translucent amethyst F14-5099GB
1 pkg. 6’o seed beads, frosted AB amber F14-5920SB
1 pkg. 6’o seed beads, iris dark bronze F14-5692SB
1 pkg. 8’0 seed beads, iris dark bronze F14-4927SB
1 pkg. Czech pressed glass teardrop, amber, 10 x 6mm F14-5409MD
1 strand Czech pressed glass dagger, topaz, 16 x 5mm F14-5810MD
1 strand Czech pressed glass dagger, amber, 16 x 5mm F14-5809MD
1 strand Czech pressed glass leaf, topaz, 9mm F14-2710MD
1 strand Czech pressed glass leaf, amber, 9mm F14-2709MD
1 strand Czech crackle beads, topaz, 6mm F14-1435GL
1 pkg. Czech pressed glass flower bead cap, amber, 7mm F14-6509MD
1 pkg. glass briolette beads, amber, 6 x 8mm F14-1918GB
1 strand amber (heated), 4mm round F14-7654GS
1 strand golden horn (natural), 6mm round F14-4787NB
1 strand golden horn (natural), ½” pipe F14-2026NB
1 pkg. hex tube bead, copper finish, 4 x 2.5mm F14-1951MB
1 strand heishi, copper finish F14-1946MB
1 pkg. smooth round bead, copper finish, 3mm F14-1499MB
1 pkg. vintage plated pewter rondelles w dots, antique copper, 4mm F14-6188MB
1 strand amber (heated), round, 6mm F14-3468GS
1 pkg. bone hair pipe with lines, brown/white, 1 ½” F14-3502NB
1 pkg. bone hair pipe with dots, brown/white, 1” F14-3168NB
1 strand wood long tube, brown, 15 x 5mm F14-2183NB
1 strand shell heishi, brown cocoa, 4-5mm F14-5377NB
1 strand shell heishi, dark pen shell, 4-5mm F14-5373NB
1 strand buri bead, antique gold (dyed), 6mm F14-3836NB
1 strand fluted, frosted rondelle, topaz, 9mm F14-2902GB
1 pkg. brass wrapped cone, 1 ¼” F14-5315FN
1 pkg. yellow agate cross pendant, 25 x 18mm F14-7438CL
1 pkg. aragonite carved turtle, 24 x 17mm F14-2501FD
1 pkg. glass bead assortment, matte translucent dark brown F14-5100GB
1 tube G-S hypo cement F14-1956TL
Other Tools & Materials:
Anvil; hammer; round-nose pliers; chain-nose pliers; wire cutters; tweezers; t-pins; fabric covered, tackable work board; stick incense
Instructions: Choker
1. Determine total length of finished piece with desired clasp: example
15.5” (39cm)
2. Cut three lengths of nylon cord in color “A,“ each approximately
3 times desired finished length, example: 39cm x 3 = 117cm. Cut two more
lengths of cord in color “B.”
3. Coat each end of the cords, for approximately 1cm, with a dab of G-S
hypo cement, and allow the glue to dry. This will enable you to use the
strand as a “needle” to go through smaller seed beads.
4. On your macramé work board, layout the clasp ends, left and
right at opposite ends of neck measurement. Pin them in place with “T”
pins, i.e. left clasp end @ the “0 cm” and right clasp end
@ the “39cm.”
5. Divide neck measurement by five for four spacer bars, i.e. 39cm divided
by five equals 7.8cm on center for each spacer bar.
6. Place spacer bars at 7.8cm intervals between clasp ends.
7. Visualize written sheet music for the next stage; the beads become
the individual notes on the lines or threads of the music. Experiment
with color emphasis, repetition and accents of color and reflective metallic
light. Just as there are subtle shifts and melodies in song, so shall
there be in your work.
Layout your large (10-12mm size) beads between the clasp ends and spacers. Think of physical balance of weight where they will appear when you are wearing the completed piece. Focal points and very special beads should be towards the center of the piece.
8. Layout your medium (6-9mm size) beads to accent and complement the large beads. Then, layout the small (4-6mm size) beads to bring visual harmony to the whole composition.
9. Surround yourself with small containers of seed beads, heishi, small accent beads (3-4mm), flowers, etc. These are your color palette bowls, and will be mixed and randomly strung as you weave through and around the larger beads you have already placed on your work board.
10. Select a cord and hold the ends in one hand, fold the cord in half to find the center point; mark with a small alligator clip. Using the layout of beads as a reference guide, begin in the center of the piece and work out toward the right or left end. If you are right handed, work toward the left end first; pick whichever end is most comfortable for you.
11. String on a bead, slide it to the center of the cord. String on several more beads of various sizes, shapes and colors to form a pleasing composition; I recommend working about 1.5-2cm at a time.
Place a small alligator clip on the cord, next to the last bead to prevent slipping.
12. Repeat Step 11 on each of your strands of cord, working from the center of each cord outward. Lay the cords flat on your work board, from top to bottom, as you string beads. (Remember the lines of the sheet music.)
13. Begin to weave cords into larger beads as you continue to string one cord then another, progressing about 1.5-2cm at a time.
Tips:
· You should have two strands of cord in a large or medium bead.
This will give strength and dimensional stability to your piece.
· Fill large-hole beads with size 11’o seed beads to reduce
stress and abrasion on the cord.
· Use a floss-puller to thread multiple cords through large beads
or to thread through hollow or filigree beads more easily.
· Use “T” pins to anchor your work in place. It prevents
slipping.
14. Check layout for visual and physical balance and color placement as you string and weave. Be flexible; add colors, textures and sizes as you progress. Size 11’o seed beads make great “bridges” over larger beads on adjacent cords.
Keep stringing and weaving cords through beads until your piece reaches the correct length for the center section. The example shown was 7.8cm on center between spacer bars.
15. Knot each cord close to last bead on each cord.
Tip: To knot, form a loop in the cord then pass the cord end through the loop. Position tweezers inside the loop and grasp the end of the cord as it exits from last bead. Pull cord gently to slide loop into place next to the bead. Pull knot tightly.
16. Thread cords into the holes in the spacer bar and slide bar next to strung section. Form knots as above on each cord as it exits from the spacer bar. Repeat for the other bar.
Tip: Knotting spacer bars into place keeps them vertical and inline, preventing shifting. The knots become a decorative element in your work but can also be hidden by remembering to place a larger holed bead next to the spacer bar (size 6’0 or 8’0 seed beads work well).
17. Continue to string beads on cords and weave into larger beads in remaining sections to the left- and right-of-center sections you just completed. As you near the end of the section close to the clasp location, remember to use a large-hole bead next to the clasp. The large hole will allow the strand to be woven back through in the finishing process.
Finishing:
18. Slide a crimp bead onto a cord. Pass the cord through the loop on
the clasp and back through the crimp bead. Pull the cord gently and tightly,
and then form a knot next to the crimp bead.
Do not cut the cord yet!
19. Put a dab of GS-Hypo Cement on the knot and let dry. Use a floss-puller to thread the cord end back through the large-hole bead next to the clasp.
20. Crimp the bead with crimping pliers.
21. Cut the end of the cord to about .5cm. Touch the end of the cord with the end of a lit stick of incense to melt cord end and seal. Be careful! Don’t melt the cord with the beads!
22. Cover the crimp bead with a sterling silver crimp cover for a professional looking finish.
Repeat Step 18-22 on all remaining cords.
Instructions: Chain Fringe
1. Determine the length of chain fringe you’d like at the center of the piece. Example: 5” (13cm). On a piece of paper, draw a vertical line 13cm long
2. Determine the width of the chain fringe. Example 5” (13cm). Draw this line on your paper at the top of the first line, extending 6.5cm to left and right of center to form a “T”.
3. Determine the length of the chain fringe at each end. Example: 1 ¾” (4cm). Draw each of these lines at the ends of the top line of the “T”, extending downward (parallel with the first line you drew). Connect the ends with the lines to form a modified “V” shape. This will give you a pattern to gauge the length of each link of the fringe. Lay the pattern next to the completed choker, matching the center lines
4. Cut 20 or 30 pieces of wire, each approximately 9cm long. Set aside. You will use these for both end links and in-line links of the chain fringe.
5. To form an end-link section of chain fringe, pick up one piece of wire from “Chain Fringe” Step 4. Coil or squiggle one end the wire by forming over round-nose pliers, using a wire-forming system (wig-jig) or forming the wire with your fingers. Flatten the decorative end by setting on an anvil or steel plate and tapping with a small hammer.
6. String beads, stones, heishi on wire, varying sizes and colors
7. Form an eye loop on the other end to complete one end link.
Tip: To form an eye loop consistently, mark a spot on your round nose pliers with a permanent marker.
8. Fold the end to form an “L” shape, close to the last bead on the link.
9. Place the inside corner of the “L” on the mark of your round nose pliers, between the jaws.
10. Hold the pliers with the 2.5cm end away from your body, and wrap the end over the top jaw of the pliers, working toward you. Stop when the wire is half-way around.
11. Remove the pliers from the half-loop and then re-insert them with the bottom jaw in the half-loop.
12. Continue to wrap the wire around the pliers the remaining half-turn.
13. Remove the pliers and grasp the eye in flat-nose pliers, with the tail extending at a right angle.
14. Grasp the end with chain-nose pliers and wrap toward yourself, around the wire body 2 or 3 times. Keep wraps close to edge of flat-nose pliers.
15. Clip the end of the tail close to the last wrap with wire cutters. One complete eye loop!
Tip: Instead of hammering wire ends to begin an end link, form an eye loop and add a dangle.
*16. To form an in-line link section of chain fringe, pick up one piece of wire from “Chain Fringe” Step 4. Repeat “Chain Fringe” Steps 8 ~12 to partially form an eye loop. Add end-link. Repeat “Chain Fringe” Steps 13 ~ 15 to complete eye loop.
17. Repeat from * to desired length of chain fringe.
18. Continue forming end links and in-line links, working out from center toward each end, decreasing lengths to match your “V” diagram. Experiment with color, size and texture of beads on your links to add interest.
19. Attach each link section to the bottom strand of the choker with jump ring.
20. Glue bits of fiber, fabrics and/or feathers into a cone and attach
with a jump ring to complete!
| Project Images | |
|
|