508-2
Beading Lesson
Using Rubber Tubing in Jewelry Making
By: Katie Hacker
Sponsored by:
Beadalon®
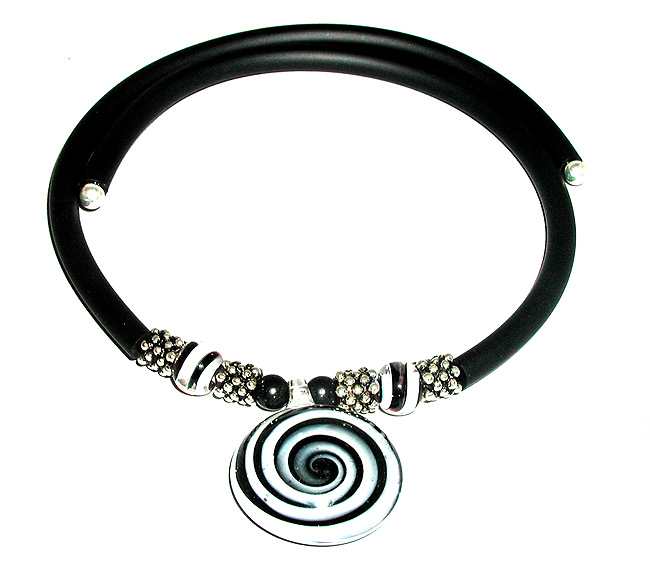
In today’s Beading Lesson, we will show you some tips for using rubber tubing to add a new dimension to your jewelry designs. Rubber tubing gives you the look of cord but allows you to use beads that have small holes.
 Rubber
tubing comes in a variety of diameters that you can use to achieve very
different looks. Use a larger diameter to make a necklace is chunky and
dramatic like this black and white choker. Or use a smaller diameter to
make a more delicate necklace like this white and gold one. For the white
and gold necklace, I used frosted rubber tubing over gold-plated Remembrance™
memory wire.
Rubber
tubing comes in a variety of diameters that you can use to achieve very
different looks. Use a larger diameter to make a necklace is chunky and
dramatic like this black and white choker. Or use a smaller diameter to
make a more delicate necklace like this white and gold one. For the white
and gold necklace, I used frosted rubber tubing over gold-plated Remembrance™
memory wire.
To make a simple memory wire necklace, string the pendant and beads onto the center of the wire. Then, use rubber tubing to cover each side of the necklace. To finish this choker, glue an end cap to each wire end.
You can also use rubber tubing to make your own spacers. For this gemstone chip necklace, cut small pieces of rubber tubing. The slices resemble heishe beads and are a perfect complement to rough-looking gemstone chips. You don’t have to limit rubber tubing to memory wire - string the pieces onto Beadalon™ beading wire to make a long, dramatic necklace.
These necklaces also use shorter pieces of rubber tubing between the beads. The matte black tubes complement the onyx beads on this gold and black necklace. The rubber tubing on this turquoise chip necklace gives the illusion that the chips are strung on thick cord instead of memory wire.
You can also use rubber tubing with ColourCraft™ colored craft
wire to create funky, freeform designs. Run the wire through the tubing,
then wrap it around the outside. Use wire and beads to create a fun flower
and wire-wrap it to attach it to the necklace.
| Project Images | |
 |
|