508-3
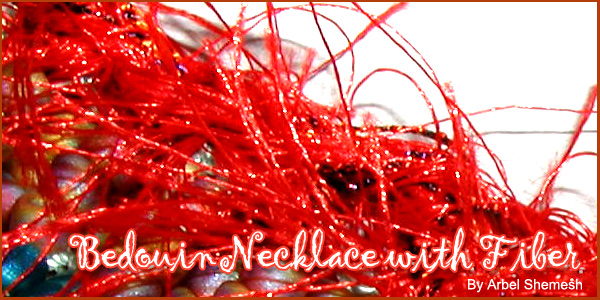
Bedouin Necklace with Fiber
By Arbel Shemesh
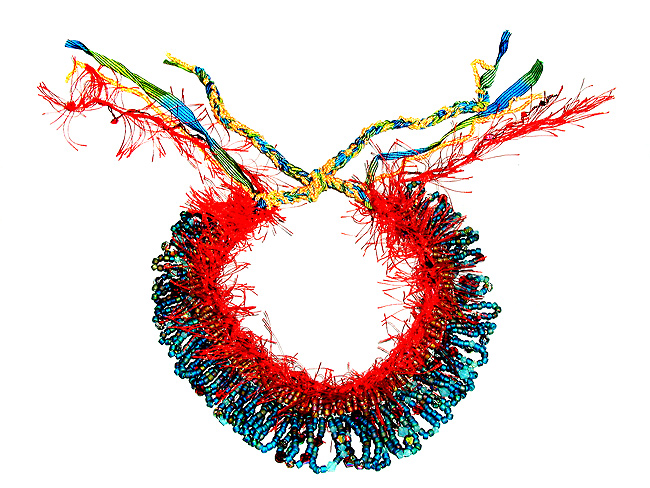
This necklace design was inspired
by the women of the Bedouin tribe, in the south of the Sinai Desert.
In 1978, I traveled to Israel with my high-school friend, Ann Gardner.
At the time, Ann was enrolled in a college anthropology program and was
scheduled to live on a kibbutz. All that changed when we traveled down
to the Sinai Desert to take a diving course. We met the Bedouins and Ann
made the decision to stay and live with the tribe as a part of her anthropology
program. Ann lived with the tribe for over six years, becoming part of
the tribe and traveling with them deep into the desert. I would visit
her, and learned beadwork from them; I was hooked!
Originally, the women used this design for the trim of their veils as
the weight of the beads helped the veil stay down in the desert wind.
Some women sold their beadwork but most of it was for personal use; now
they rely on the beadwork as part of their livelihood. For any information
on Bedouin beadwork please email barbara@sinainet.com.eg
Material needed
1 Spool of Silkon thread, #2 medium weight Turquoise F14-1067BS
1 Pack of Delica needles F14-1019BS
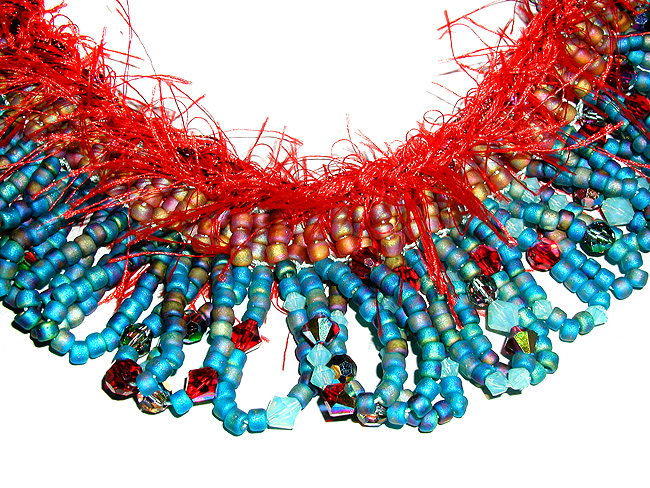
2 Boxes (40 grm), size 6 frosted AB transparent root beer seed beads F14-5962SB
2 Boxes (40 grm), size 6 frosted AB transparent emerald green seed beads
F14-5956SB
2 Boxes (40 grm), size 6 frosted AB transparent peacock seed beads F14-5959SB
1 Swarovski® crystal round AB 6mm, siam F14-1570CY
1 Swarovski® crystal 6mm, vitrial medium F14- 2858CY
1 Swarovski® crystal 6mm, opal F14-2900CY
1 Summer fiber card from Adornaments F14-2751BS
1 Beading threader F14-3262TL
1 Crochet hook, #2.75
Instructions:
The top on the necklace is crocheted first, so, when you string the beads, you string beads for the fringe first and then the beads for top row. This way the top row will be positioned to be crocheted first.
1. Thread the Silkon thread onto the beading threader needle.
2. For the fringe, pour two boxes of emerald green and two boxes of peacock
seed beads and a mix of the crystal beads into the beading threader.
3. Dip the needle into the speedy threader and spin, the beads will jump
onto the needle (follow beading threader instruction sheet). String 140”
of mixed beads (there is a formula at the bottom of these instructions).
Tips for stringing: skim the tip of the needle on the top of the beads.
This way, the needle will not get stuck in the bowl and slow it down.
Brace the needle on the edge of the bowl for stability.
4. Empty the fringe beads from the bowl, and refill it with 2 boxes of
the root beer size 6 seed beads. String 38” of beads (formula below).
5. To crochet the necklace, move the beads a bit down the thread and make
a slip knot. Move six beads up to the slip knot. With the crochet hook,
grab the thread after the six beads and make a chain stitch.
6. Stitch 2 chain stitches; make sure to adjust the size of your stitches
so that the groups of beads sit side by side without a lot of space between
them and so they don’t bunch up. Repeat Steps 5–6, fifty more
times, then measure the row. Because the formula is not exact, you may
or may not have 16”. If you have 16” of necklace and there
are still some rootbeer beads on the thread, cut the thread from the spool,
take off the extra rootbeer beads and re-attach the thread to the spool
with a small knot. Don’t worry about the knot, you can crochet
it in to the necklace so it does not show. If you don’t have
16”of necklace yet, keep going until you do. Once you do, the top
row is completed. Leave the thread attached to the spool as all the rows
are crochet on the continuous thread.
7. The crochet hook should be on the top side of the top row. To start
the fringe it needs to be on the bottom of the group of beads. Chain stitch
your way to the bottom of the top row until you are connected at the bottom
of the group with 3 beads on either side of the crochet hook.
8. Move 2.5” of the fringe beads to the crochet hook (I measure
them against my finger; again, this is not exact). Chain stitch, creating
a fringe; chain stitch the fringe to the bottom of the last group on the
top row.
9. Repeat Step 8 until all the top-row groups have fringe. If there are
fringe beads left over, that is fine; take them off after cutting the
thread.
10. Chain stitch to the top row to give a base for the fiber row.
11. Unwind the peach chenille and green and blue ribbon from the fiber
card, cut them both in half. Make 2 groups of peach chenille and green
and blue ribbon, and tie each group onto each end of the necklace.
12. Crochet a couple of stitches on the end of the necklace, to create
a base, then chain stitch the 2 yarns together to make a rope for tying
the necklace around the neck. Do the same on the other side of the necklace.
13. Tie the red eyelash yarn from the fiber card to one end of the necklace,
onto the top row. Chain stitch a yarn row on top of the bead row, make
sure to carry the original thread along to hide it. It isn’t
necessary to go into every stitch on the top bead row, if you do, it will
make the yarn dense.
The necklace is done – enjoy!
If you choose to use different size beads you can change the formula
to adjust to the different size. This formula is for size 6 dynamite beads:
For a 16”necklace:
The top row is made out of groups of 6 beads each, when you put the groups
side by side, 3.5 groups make one inch. To figure out how many beads you
need per inch, calculate 6 beads X 3.5 groups = 21 beads in an inch of
the crocheted necklace. If you are making a 16” necklace you need
16 groups of 21 beads = 336 beads. Nine beads strung singly on the thread
make one inch, 336 beads divided by 9 beads = 38” so you can string
38” of beads.
For the fringe:
1”will have 3.5 fringes, 16” X 3.5 = 56 fringes. Every fringe
requires 2.5” of beads, 56 fringes X 2.5” = 140” of
beads.
| Project Images | |
|
|