513-1
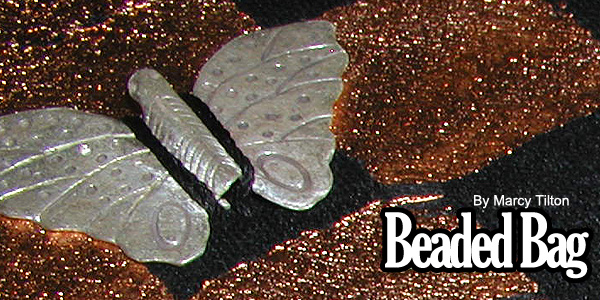
Beaded Bag
By Marcy Tilton
Materials
for the bag:
Tote bag pattern: Vogue 8173
Outer shell fabric: silk noil or other fabric of choice
Lining fabric: quilting cotton is a good choice
Fusible firm interfacing - such as Stacy Shape Flex or non-woven pellon-type
interfacing designed for crafts
Both bag and lining are backed with the interfacing: two layers of
interfacing on the body of the bag, one layer on the lining.
Notions of choice to complete patterns
Materials for gold-leafing the fabric:
Metal leaf – gold: F14-2623BS; silver: F14-2624BS; copper: F14-2625BS
Matte medium, such as Liquitex® Medium Mat
Sponge brush
Silk screen
Tub of water large enough to fit the screen (or a sink close at hand)
Padded surface: piece of acrylic craft felt that is large enough to place
a double layer beneath the cut out bag,
Clean piece of muslin large enough to cover the cut-out bag (for placing
over the leafing)
Parchment paper
Natural bristle brush
Materials for handles:
1-3/4 yard ribbon or braid (self fabric or contrast fabric are another
option to ribbon)
Ribbon used on the bag is stiffened by fusing two layers of ribbon together
using a fusible web such as Steam-a-Seam2.
Materials for embellishment:
(2) Carnelian Celtic knot pendant – F14-1796JW
(4) Chinese coins – F14-8641FN
(4) Carnelian Celtic knot coin – F14-5618FD
(2) Hill Tribes butterfly, large – F14-5122MB
(2) Hill Tribes butterfly, medium – F14-2178FD
(6) Hill Tribes silver leaf – F14-2184FD
(6) Hill Tribes silver leaf – F14-8121FN
(6) Turquoise donuts, assorted – F14-1398NB
(4) Tube bead – F14-6143MB
Silk thread – F14-1783BS
Tools:
Scissors
Chain-nose pliers
Sewing needle
Chenille needle – F14-1943BS
Super glue – F14-3086TL
Thread Heaven – F14-1050BS
About Thermofax generated silk screens.
The screens I make, are made one at a time using a Thermofax; a small
heavy machine which is a predecessor of today’s copy machines. The
silk screening material is a double layer polyester mesh, not silk. A
carbon-based original is layered with the screen material and slipped
into in a plastic carrier. The Thermofax has an opening where the carrier
is inserted. A belt passes the carrier through the machine (this takes
about 30 seconds), and a special bright, hot bulb burns the design from
the copy onto the screen. The screen is now ready to use, mounted into
a plastic frame.
Marcy’s screens are hand made: the image is designed for the screen size, the screens are made one at a time, inspected for a clean burn, then mounted on the plastic frames with strong double sided tape.
Creating the Handle
It’s great to finish the handles first – this way they’re
reading and waiting when the body of the bag is ready to be constructed.
Finished length of the handles is 22”.
1. Cut four 28” lengths of ribbon.
2. Cut two strips of fusible webbing, 18” long and 1/4” narrower
than the ribbon.
3. Fuse the web in the middle/center of the piece of ribbon, so there
is no fusible web for about 2” at either end. This makes it easier
to slip on the decorative tube bead.
4. Following manufacturer’s instructions, fuse two lengths of ribbon
together, then stitch together along the edges.
Slip on the decorative bead and trim each handle to 23”. This includes
1/2” seam allowance at either end to attach to the bag.
Set the handles aside.
Preparing the fabric.
1. Choose which bag you’d like to make.
2. Cut the pattern out for the bag you’ve chosen.
3. Fuse the fabric and the lining together.
How to apply metal leaf to fabric.
Read all directions before you begin, and have fabric, the tub of water,
package of leaf, brush, matte medium and muslin all close at hand. Work
in a room with no draft, ventilation fans or wind, as the leaf is so fragile
it can blow away before you use it. It’s handy to have a small portable
vacuum to clean up excess leaf at the end.
Make a practice sample before working on the fabric you chose for the bag. Work on a padded surface - 2 layers of acrylic craft felt is perfect.
1. Place the fabric onto the padded surface. Position the screen so it’s centered side-to-side and top-to-bottom, using the finished size of the bag as a guide.
2. Load up the brush with matte medium. Squeeze a line of matte medium at the top of the screen then pull the sponge brush through the medium downward, using an even pressure, spreading the medium evenly across the screen. It may take more than one pass to apply enough medium to the fabric. You can gently pull away one corner of the design to check on the amount…and remember that this technique is hand done, so each impression is one of a kind and necessarily ‘perfectly imperfect.’
TIPS:
· Watch your screen as you work and be sure to keep the screen
'wet' with medium at all time.
· Do not allow the matte medium to dry or it will clog the screen.
· Use plenty of medium as using too little will result in a faded
obscure image.
· Get into the habit of checking to be sure the open areas of the
mesh on the screen are clear.
3. As soon as the matte medium is screened onto the fabric, remove the screen, lifting carefully, and immerse the screen into a tub of water so it stays wet, enabling you to rinse and remove the matte medium later
4. Working quickly and carefully, cover the entire screened motif with overlapping squares of leaf. The design should ‘strike through’ or show up through the leafing.
5. Cover entire leafed surface with a piece of clean muslin or parchment paper and burnish/rub firmly but gently so the leaf adheres to the matte medium.
6. Allow the medium to dry thoroughly, 2-3 hours, leaving the muslin in place to prevent wind from disturbing the leaf; drying overnight is a safe bet.
7. Remove excess leaf by brushing the leafed surface with your fingers or clean natural bristle brush. This can be done outdoors or indoors; I recommend having a vacuum close at hand to clean up the excess leaf when working indoors The leaf makes a strong bond with the matte medium, and is now ready for beading, and can be ironed or laundered.
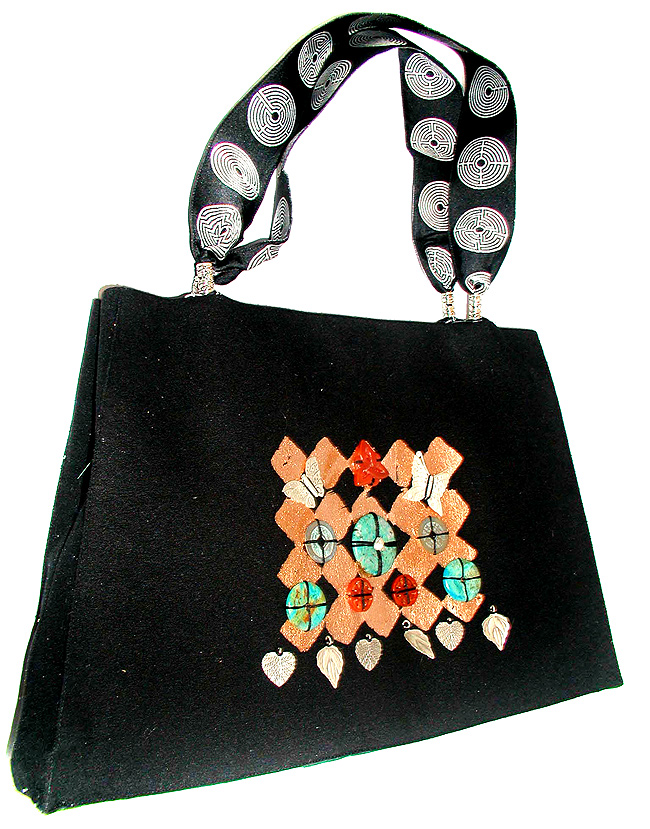
Beading the Bag
Beading is done before the bag is constructed. The interfacing is so firm,
it is not necessary to use an embroidery hoop.
1. Choose an assortment of flat smooth beads that are sturdy and won’t
catch on things. This is the fun part - look for related shapes, textures,
sizes and colors.
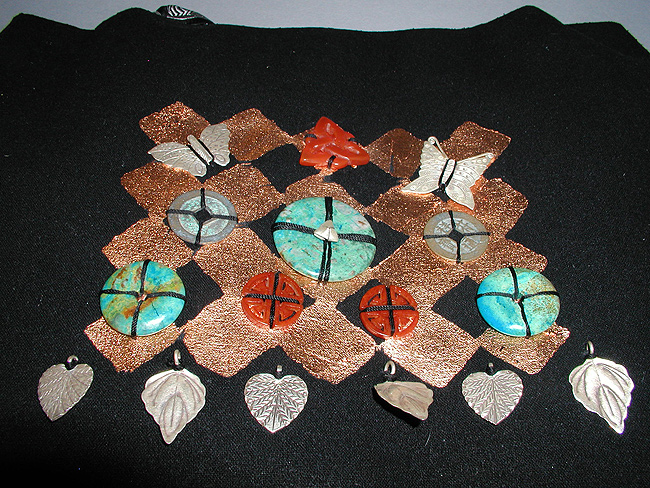
2. Mock up the lay-out of the beads, take a digital photo and print a
copy for a template.
3. Cut an 8” length of silk thread. Thread on a chenille needle then double the thread. Run the thread through Thread Heaven.
4. Starting with the center donut motif, bring the needle out from the back side of the fabric. Pull the thread through, leaving a 2” tail on the back side. Thread on your bead then pass the needle back through the bag – repeat if necessary. Once the bead is secure, knot the two thread ends together; making more than one knot if necessary. Remove the needle.
5. Repeat Step 4, placing and sewing the other beads on one at a time. Each handmade bead is slightly different, so adjust placement of each one if necessary.
6. When all the beads are sewn into place, put a drop of superglue on each knot to secure. Trim thread ends once glue is dry; do not cut the threads while the glue is wet as it will destroy the scissors.
Construct the bag after the beads are sewn in place; follow the instructions provided with the pattern.
| Project Images | |
 |
|