603-3
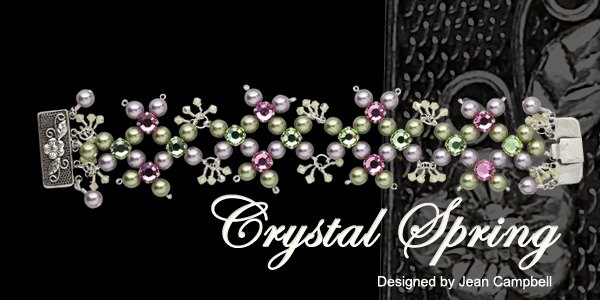
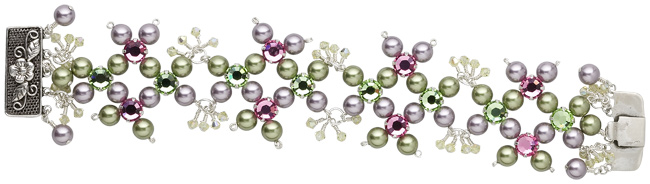
Crystal Spring
Designed by Jean Campbell
Material needed
1 pkg Swarovski ® crystal, jonquil AB, 3mm bicone (pkg/144) F14-1028CY
1 pkg Swarovski® crystal pearl, mauve, 6mm round (pkg/50) F14-1027GP
1 pkg Swarovski® crystal pearl, light green, 6mm round (pkg/50) F14-1020GP
1 pkg Swarovski® crystal montee, rhodium-plated, rose, 6.4mm (pkg/24)
F14-2740CY
1 pkg Swarovski® crystal montee, rhodium-plated, peridot, 6.4mm (pkg/24)
F14-2739CY
1 pkg Jumprings, sterling silver, 5.0mm round, approximately 22 gauge
(pkg/50) F14-2314FD
1 pkg Headpins, 2-inch sterling silver, approximately 26 gauge (pkg/100)
F14-4455FD
1 pkg Headpins, 1 1/2-inch sterling silver, approximately 22-gauge (pkg/100)
F14-4452FD
1 pkg Wire, sterling silver half-hard, 24-gauge round (pkg/5 feet) F14-1167WR
1 Clasp, 5-strand sterling silver, 25x10mm rectangle F14-6158FN
Tools
1 pair Pliers, 5-inch side-cutting with ergonomic grip
1 pair Pliers, 5-inch short round nose with ergonomic grip
1 pair Pliers, 5 ¾-inch short chain nose with ergonomic grip
Instructions:
Step 1:
Make a dangle by stringing one 3mm Swarovski jonquil crystal bicone onto
a 26-gauge headpin. Secure with a wrapped loop. Repeat this step to make
40 bead dangles in all. Set aside. (For instructions on making a wrapped
loop, please visit www.firemountaingems.com/beading_howtos.)
Step 2:
String one mauve pearl onto a 22-gauge headpin. Begin a wrapped loop but
before making the wrap, attach to an end loop of the clasp. Finish the
wrap. Repeat so that one mauve pearl dangle is on the top and bottom loops
on each side of the clasp. Repeat again using a green pearl dangle and
attaching to the middle loops on each side of the clasp. Set clasp aside.
Step 3:
Cut sixteen 2-inch pieces of 22-gauge wire. Make double simple loops on
one end of each of the wire pieces; like a key ring.
Step 4:
On one wire piece, string one green pearl, one rose montee, one mauve
pearl, one peridot montee and one green pearl. Make a double loop to secure
the beads and set aside. On a second wire piece, string one mauve pearl,
one peridot montee, one green pearl, one rose montee, and one mauve pearl.
Make a double loop to secure the beads and set aside.
Step 5:
Place the two strung wires next to each other so the different colors
of montees are side by side.
Step 6:
Create diamond shapes by stringing one green pearl onto another piece
of wire and crossing that wire through one peridot montee from the first
wire laid out in step 6. String one mauve pearl onto the same wire and
cross through the opposite rose montee. String one green pearl and make
a double loop to secure the beads. String one mauve pearl on another wire
and cross through the rose montee on the first wire. String one green
pearl onto that wire and cross through the opposite peridot montee. String
on one more mauve pearl and make a double loop to secure the beads.
Repeat to make 4 wire diamonds in all.
Step 7:
Place the diamonds side by side so the pink montees are on top and the
peridot montees are on the bottom.
Step 8:
Link the double loops of two diamonds together using a jumpring. Before
closing the rings, add 4 jonquil dangles onto each ring. Note: It looks
best when you attach dangles to the outside of the bracelet.
Step 9:
Use jumprings to link the bracelet ends to the open loops remaining on
the clasp. Before closing the rings, add 4 more jonquil dangles to each
ring as in Step 8.
| Project Images | |
 |
|