613-2
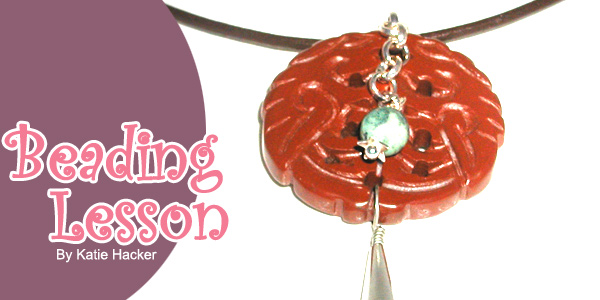
Beading Lesson
Making Chain Bails and Tassels
By: Katie Hacker
Sponsored by:
Beadalon®
In today’s Beading Lesson, we’ll show you how to make easy chain bails and tassels. Both techniques are easy ways to add a designer look to your next jewelry project.
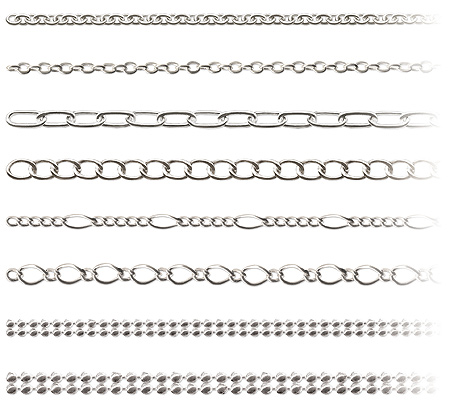
There are many different styles of chain. To choose the
one that's best for your design, think about the overall look you're going
for. You can use figaro chain for a classic look, curb chain for a funky
look, elongated chain for a contemporary look or very thin cable chain
for an understated look. Larger curb chain is often used to make charm
bracelets.
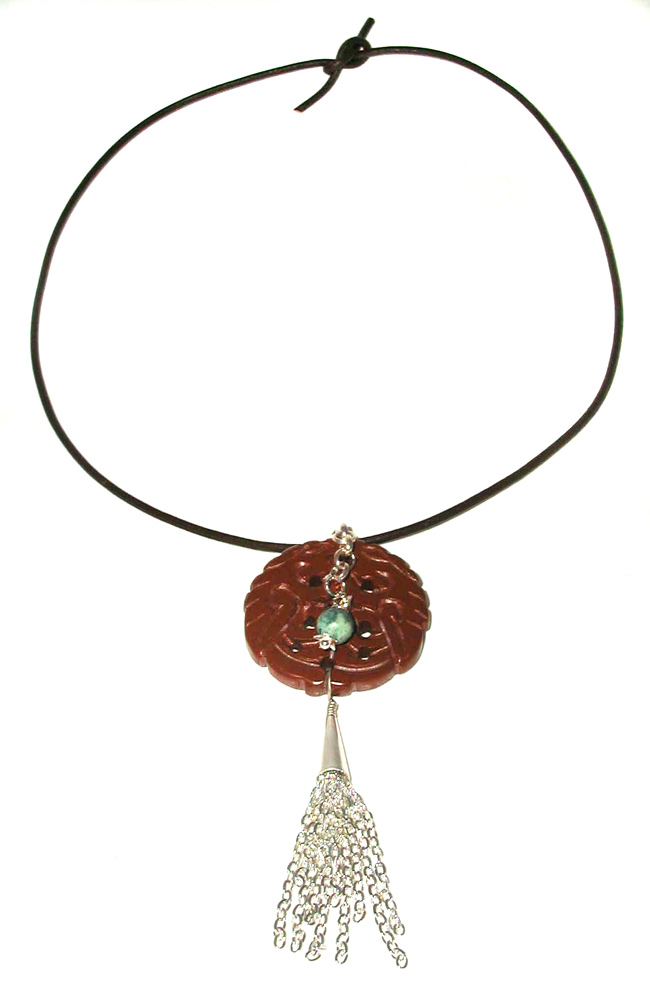
Donut-shaped gemstones are always a little tricky to incorporate into a design because they require a special hanger. Make it easy by using chain. Measure at least three pieces of chain to fit around the top of the donut and then add about ¼”. Fit the chain around the donut and use small jump rings to connect the ends. Pass the stringing material through your new chain bail and you’re good to go!
You can make an easy chain tassel by attaching a bunch of short chains
to a bead link. Use heavy-duty wire cutters to cut at least 10 pieces
of chain. Make a loop on one end of a piece of wire. String the chains
onto the loop before wrapping it shut. String a bead cap like a little
hat over the loop. Add a bead and then make another wrapped loop. Attach
a bail to the upper loop for a more professional look. This would make
a cool earring or pendant.
For more ideas and inspiration visit www.katiehacker.com
| Project Images | |

|
|